

In today’s photography tutorial, I am going to share with you all 50 tips for Raynox Photography. That’s right! Not 5, 10, 20,… 50. That is all my tips for macro photography clubbed in one post. Although these tips will be more suitable if you have a Raynox DCR 250 or Raynox DCR 150, you can use them for macro photography in general. If you have a macro lens or extension tubes, whatever, I am sure my tips will be useful there too. And without further ado, let’s start.
1. How To Attach
Raynox lens comes with a Universal Mounting adapter. Screw the Raynox into the adapter and clip the handles to the very front of the camera lens: it grips onto the thread that will usually hold a filter. It can clip into any lens having a diameter between 52 and 67mm with this adapter. If the lens diameter is not in this range, you will have to buy another adapter.
2. Think About Focal Length
The more focal length you have, the more magnification is provided by the Raynox. But you will find it easier to start with shorter focal lengths ie around 50mm and then gradually increase your focal length to 70 or 100mm.
3. Use Narrow Aperture
The depth of field of a Raynox is very shallow. You get the maximum depth of field by using the smallest aperture available to you (the largest f-number, quite possibly around f/22). Sometimes I have even used f/25.
4. Set The Exposure Mode
I don’t prefer to use the manual mode coz it may take time to set the camera and my insect may scurry away while I am doing that. I use Aperture Priority and set my aperture around f 16 if my subject is small or f 22 if it is considerably large. You may use shutter priority and let your camera decide the appropriate aperture.
5. Shoot In RAW
Always shoot in RAW format. This gives you more flexibility in post-processing and you can edit your images with more ease and bring out lost detail.

6. Start With Still Subjects
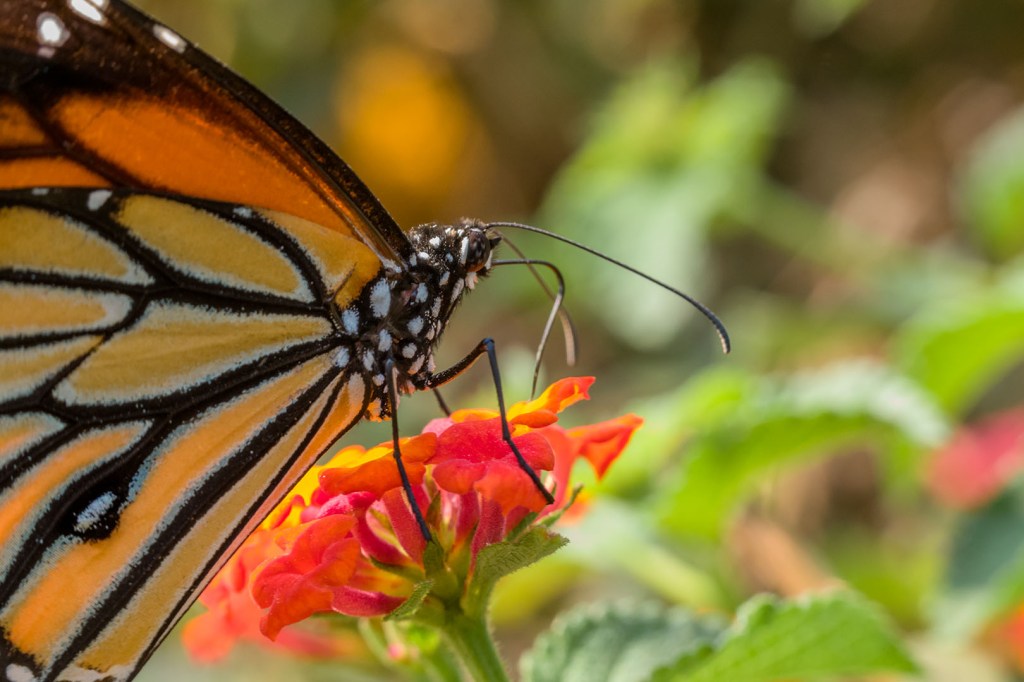
You might want to begin with subjects that aren’t going to fly away. It’s exciting to capture a macro image of a butterfly but it can also drive the most skilled photographer crazy. So begin with inanimate objects like food or plants and then graduate to things that move.
7. Do Some Research
If you want to capture macro subjects outdoor, it’s worth doing a bit of research on where and how to find suitable subjects to photograph. For instance, if you are looking at capturing images of insects (like butterflies), it helps to study their habitat, breeding seasons and what behaviors you should expect to encounter, etc.
8. Learn The Basics
Look up a few tutorials on Google or YouTube and fine-tune your knowledge about macro photography. You can also read books and articles online and hone your skills every day to be a better photographer.
9. Go Close
In order to bring your subject into proper focus, you have to go close to it. So if it is a stinging or flying insect, I avoid my Raynox there but otherwise, it works great with flowers and insects like ants, spiders, etc.
10. Focus Right
Although you can use autofocus with a Raynox, when doing macro you may find it easier to put the camera into manual focus mode. Also, it is easier to focus with the live view sometimes rather than the viewfinder. Once you compose your shot, move your camera back and forth till you arrive at the correct focus and click.
11. Control Your Point Of Focus
Since the depth of field of the Raynox is so shallow, you need to decide which part of your image you want in the best focus. For me, mostly it is the eye of my subject. As long as the eye is sharp, it’s pardonable if the rest of my image is a bit off focus.
12. Use Single Point Focus
Try using single-point focusing when taking macro photographs. This allows you to pinpoint exactly which part of the subject you want to focus on. But still, it will be a task to focus right as the Raynox has a very shallow depth of field.
13. Stabilise Your Camera
You may find it easier to start using a tripod with your Raynox and gradually move to handheld. If you are shooting outdoors, adjusting a tripod every now and then tends to slow you down and this really works best if the subject doesn’t move.
14. Know Your Magnification
Bear in mind this formula – Magnification with the Raynox = Focal length of primary lens/Focal length of the Raynox. The default focal length of Raynox DCR 150 is 208mm and DCR 250 is 125mm. So the magnification I get in 200mm with Raynox DCR 250 is 1.6x and DCR 150 is 0.96x. As I increase the focal length obviously the magnification of the Raynox will increase.
15. Check Your Working Distance
Working Distance is the distance between the front of your lens and your nearest subject. The working distance of Raynox DCR 150 is 8 inches and the same of Raynox DCR 250 is 4 inches. If your working distance is too small, you might end up scaring your subject or blocking the light simply because you are too close.

16. Use External Flash
Using an external flash with your Raynox is advisable as the flash helps you to freeze the movements of the subject and add more light to your scene. Also, since I have to shoot in very high f numbers, the flash allows me to lower my ISO. Avoid using your camera’s flash with the Raynox.
17. Add Diffusion
The bigger your light source, and the closer it is to your subject, the softer the shadows will be and it’ll look more flattering. So a quick way to make the light source bigger is to diffuse it. If you don’t have a diffuser, you can make one at home, using some white paper, aluminum foil, and cardboard.
18. Use Reflectors
Just as in regular photography, you’ll often find unwanted shadows on your subject and hence may lose out on some important details. So use a reflector to bounce the light of the flash to fill up the shadows of the subject. I have made a reflector using some white paper and aluminum foil.
19. Shoot In Natural Light
If you don’t have a flash, try using a torch or a lamp to make your scene brighter or shoot in bright sunshine.
20. Understand The Lighting Position
The next time you shoot, play around with different lighting directions and see how it affects your image. The light mostly looks best if it’s coming from the side or somewhere from the back.

21. Modify The Light
There are many options for modifiers available like domes, flash brackets, and light spheres. Try to use them and see which works best for you. A diffuser attached to your flash will help spread the light out and give you a more natural look.
22. Know The Sync Speed
Sync Speed is the maximum shutter speed you can use when using flash. It varies from camera to camera, my camera Nikon D5300 has the sync speed of 1/200 meaning I cannot increase my shutter speed beyond 1/200 with the flash on. Look up the sync speed of your camera if you don’t know it in the camera manual or simply Google it.
23. Use VR
Vibration reduction is an in-lens feature that improves the stability of an image and reduces camera shake. So when you are handholding your lens, if it has VR reduction it is a good idea to use it.
24. Mind The Background
The background is as important as the subject itself. As the Raynox allows you to go close to the subject, you are likely to get smooth bokeh, which will increase the impact of your photographs.
25. Fake The Background
You can create a fake background by using decorative paper, or even just plain white or black cardboard or cloth. Just clip the background onto a stand or hang it against the wall.

26. Shoot At Eye Level
It is best to perform macro photography at the eye level of your subject. By positioning yourself this way, you will increase the depth of field ensuring you have the majority of your subject in focus.
27. Get Low
Don’t be afraid to get down and dirty as the most interesting point of view is often that of an insect. If your camera has a “live view” mode with a swivel-out screen, it makes for more convenient viewing.
28. Compose In-Camera
Whether you’re shooting macro or any other photography style, a photographer should learn how to improve their composition in-camera. Instead of cropping a photo of an insect to make it look larger, increase your subject magnification while shooting so you get to keep your original resolution.
29. Learn About Composition
Study the various rules of composition and use them to improve your photos. Remember the rule of thirds when holding the camera to your eye and try and position your subject as per the lines. Leaving space in front of the creature’s eyes can be very appealing.
30. Learn To See
Start paying attention to the small details wherever you go. For example, instead of looking at the whole tree, look closer at the bark or the individual veins on a leaf.

31. Experiment With Subjects
There are a variety of subjects that make fantastic macro subjects like insects, flowers, water droplets, coins, eyes, or just anything small but intricately detailed. Choose a subject and start experimenting.
32. Be Patient
You will need a lot of patience to get a good photograph. Keep moving your camera till you get your full subject in focus. Spend some time on a single subject than changing your subject after every few shots.
33. Location & Weather
Though there might be conditions when the background, light, or shadows are more ideal than others, you can capture macro images during every season. And since much of macro photography is concentrated on nature, you’ll have a chance to get great shots any time of year. You can go to a dedicated park or start with your backyard.
34. Capture The Details
Macro photography is all about the details. Your goal is to capture the texture, shapes, and details of your subject.
35. Keep It Tidy
When you’re capturing these details, everything shows up. Dust, pet hair, and fingerprints that you can’t even see with the naked eye suddenly become annoyingly ultra-visible in close-up, highly magnified photos.

36. Use Water Droplets
Take a picture of flowers right after a rain shower or spray some water on the flowers yourself. The water droplets on the flower petals or the leaves will add interesting details to your image.
37. Move Slowly
Some insects are more tolerant than others but always move slowly. Absolutely avoid making fast or hectic movements, as that will scare off the bugs.
38. Take Multiple Shots
The more photos you take, the more chances you’ll have to experiment, and the more opportunities you’ll have to get the perfect shot. This is especially true of macro photography, where you may not get another chance to be so up close and personal with your subject.
39. Try Many Angles
Try to find uncommon angles, such as shooting the insect from the side, from the front, or from below. Make use of your flip-out screen if you don’t want to crawl on the ground.
40. Check LCD Panel
Use your rear LCD facility to ensure you have got the shot you want before moving on. Look carefully at the corners to make sure there are no intrusions.

41. Use The Histogram
While you are reviewing your photo, also make it a habit to check its histogram. It’ll help you determine if your shot is well exposed or not. Because your image may be sharp, but if it lacks exposure, your efforts may go in vain.
42. Focus Stack
Since you get a very shallow depth of field, it may get difficult sometimes to bring your entire subject in focus in one shot. So you can focus stack meaning have only one part of your subject in focus in one shot, then in the next shot have another part of your subject in focus, and so on, till you make sure you have clicked all parts of the subject. This works best if your camera has the support of a tripod. Then bring your images in your post-processing software and stack them up.
43. Edit Your Images
You should absolutely enhance the colours in your macro photos in post-production. That way, you can bring out the beauty of your subject–and create a photo that really wows your audience. You may use any software that you have access to.
44. Share Your Work
After editing your images, pick up the best ones and start sharing them online with your friends. Take feedback from other photographers so that you can find out where you need to improve.
45. Practice A Lot
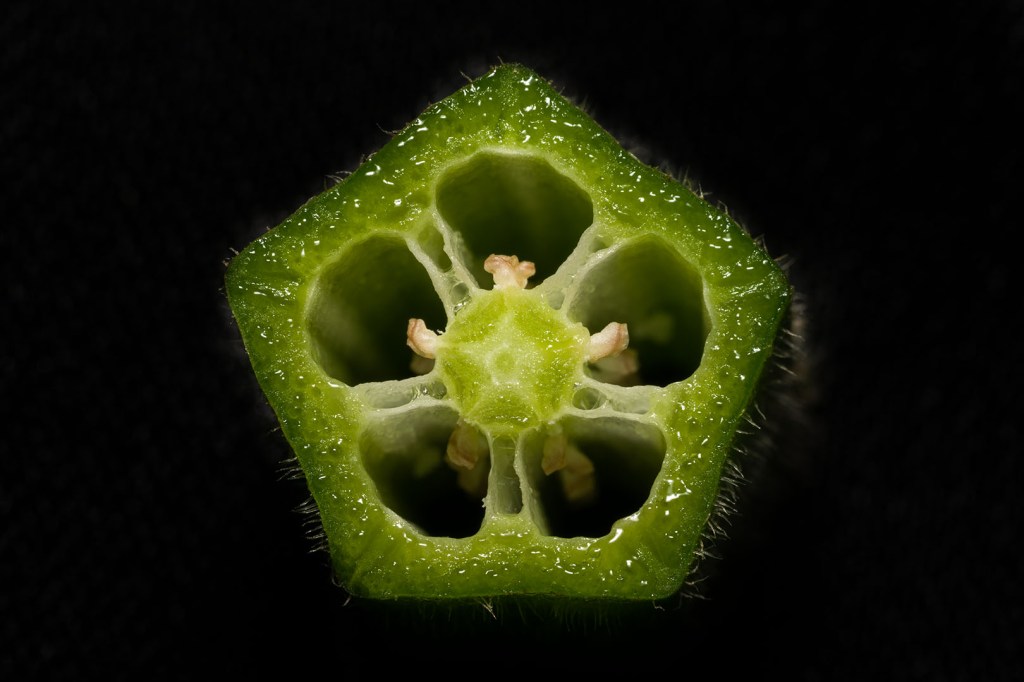
The old saying “practice makes perfect” is particularly applicable to macro photography. You can practice your macro photography in your backyard or photograph the tiny objects at your home that look fascinating at super close range. I have literally tried my Raynox on every vegetable in my fridge.
46. Shoot By A Window
Windows work as perfect diffusers when taking pictures indoors. You can shoot by the window almost any time of the day. All you have to do is place your subject beside the window and you start shooting.
47. Make Mistakes
I am a firm believer that there is no better teacher than your own mistakes. It is okay if your shot is not tact sharp or if your background is cluttered, or if you cut a part of the flower in the frame. Mistakes are what will make you better if you are willing to learn from them.
48. Respect Nature
Never harm the insect or flower you are photographing – always choose patience-based techniques. Each life, no matter how small, should be respected. If you don’t, it will somehow show up in the image and will harm your credibility as a photographer.
49. Be Creative
Don’t be afraid to be creative and experiment with things, even if they sound crazy or silly at first. If you can visualize your idea very clearly in your mind, sooner or later, people are gonna understand your thought process and appreciate your creativity.
50. Enjoy
I love macro photography because it makes me appreciate the beauty in everyday things that I may never notice. The dew drops on the leaves, the bubbles in the water, and the pollen of the flowers, constitute a macro world of their own.

I have been using my Raynox DCR 250 for more than 3 years and it has never deceived me so far. It is not a macro lens but can rival the magnification of any macro lens. I have clicked many photos with it, a few of which I showed you today.
Also Read – Raynox DCR 250 Sample Photos
CONNECT WITH ME:
YouTube: https://www.youtube.com/user/agarwalsonika7
Instagram: https://www.instagram.com/agarwalsonika/
Twitter: https://www.twitter.com/agarwalsonika7/
Facebook: https://www.facebook.com/sonikatravels/
